みなさんどうもこんにちは♪ブログに訪問いただきありがとうございます!
ファミリーライフブログ(@familiy_lifeblog)のパパです♪
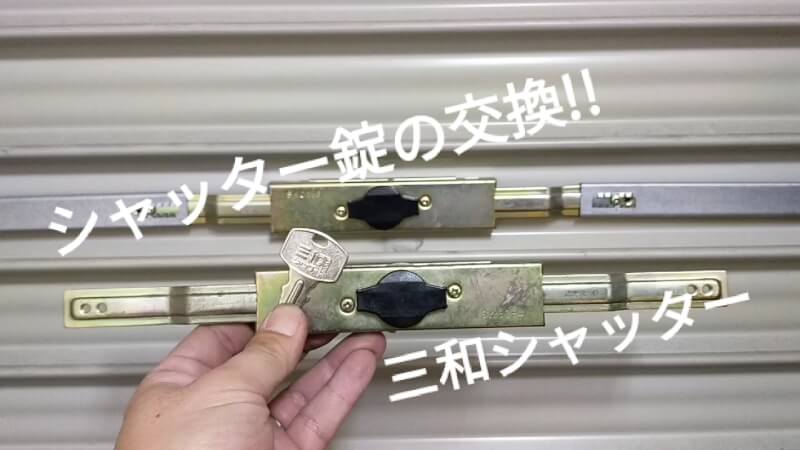
先日シャッターの鍵を交換する機会があったので記録として撮影しました。
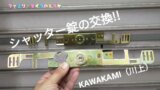
前回紹介した「KAWAKAMI(川上)シャッター」とは別にもう一つシャッター錠が付いていたのでそちらも交換しました。
今回交換したのは「三和シャッター」です。交換の手順を撮影したので交換方法を紹介したいと思います。
![](https://familylifeblog.net/wp-content/themes/cocoon-master/images/man.png)
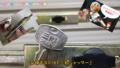
Youtubeにアップした動画付きで紹介しています♫
【三和シャッター】シャッター錠を自分で交換してみました♪【DIY】
![【三和シャッター】シャッター錠を自分で交換してみました♪【DIY】](https://familylifeblog.net/wp-content/uploads/2022/04/replacement_shutter_lock_sanwashutter_-17.jpg)
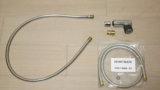
今回交換に使用したシャッター錠は「三和シャッター」のものです。よく使われているシャッター錠で交換はとても簡単にできましたよ〜
↓交換に使用したのはコレッ↓
![](https://images-fe.ssl-images-amazon.com/images/I/41OQxCq5JjL._SL160_.jpg)
三和シャッターKS-25 別カギ
「三和シャッター」のシャッター錠の交換方法を紹介
![【三和シャッター】シャッター錠を自分で交換してみました♪【DIY】](https://familylifeblog.net/wp-content/uploads/2022/04/replacement_shutter_lock_sanwashutter_-13.jpg)
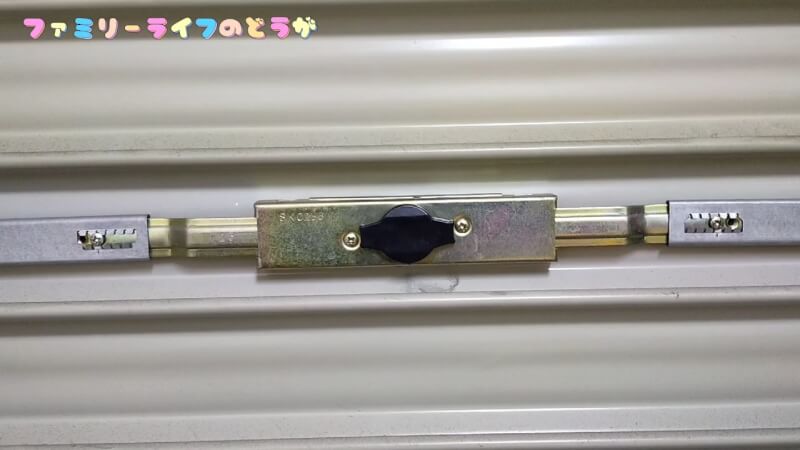
それでは「三和シャッター」のシャッター錠を交換したいと思います。
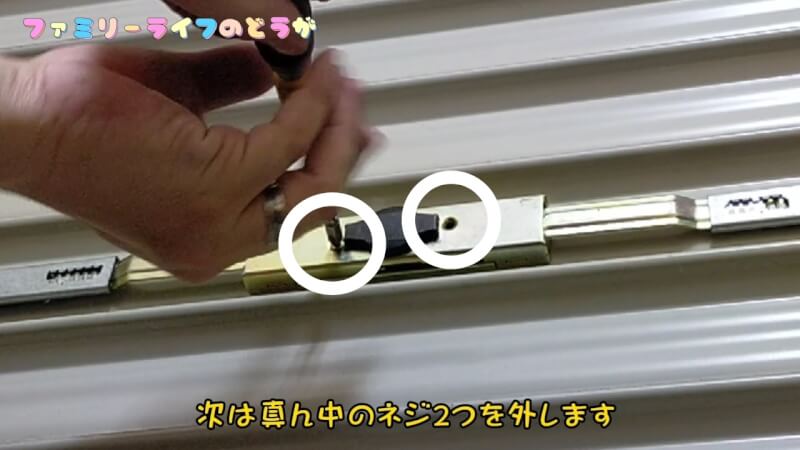
まずは錠のラッチバーとアームについているネジ2箇所の位置を覚えておきます。後から取り付けた錠も同じ位置に取り付けるので憶えておくといいです。
![【三和シャッター】シャッター錠を自分で交換してみました♪【DIY】](https://familylifeblog.net/wp-content/uploads/2022/04/replacement_shutter_lock_sanwashutter_-12.jpg)
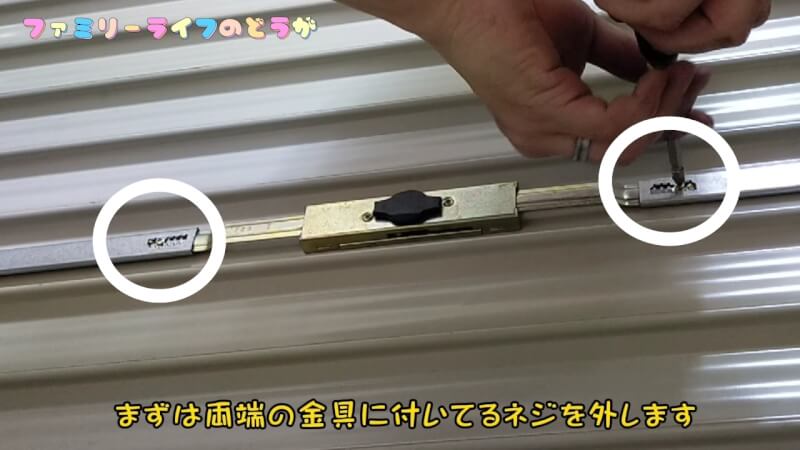
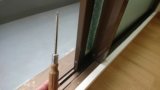
まずは画像の鍵のラッチバーとアームを繋いでいるネジを2箇所外します。
![【三和シャッター】シャッター錠を自分で交換してみました♪【DIY】](https://familylifeblog.net/wp-content/uploads/2022/04/replacement_shutter_lock_sanwashutter_-11.jpg)
錠本体のサムターン付近にある取り付けネジを2箇所外します。
![【三和シャッター】シャッター錠を自分で交換してみました♪【DIY】](https://familylifeblog.net/wp-content/uploads/2022/04/replacement_shutter_lock_sanwashutter_-10.jpg)
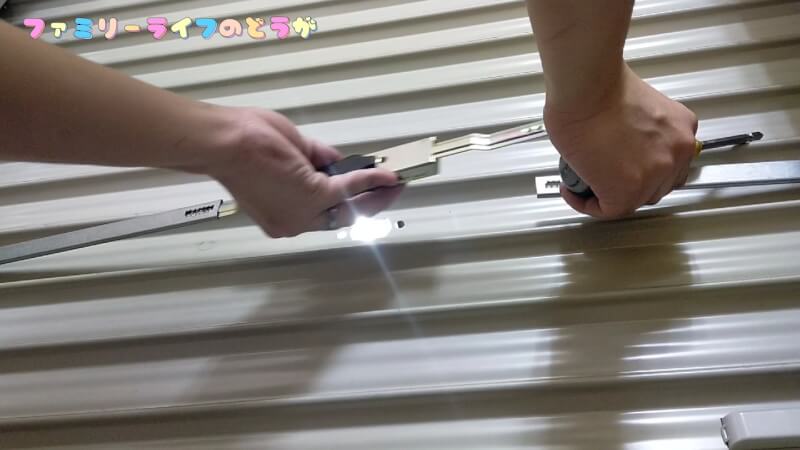
ネジを4箇所外すと錠本体が外れます。外側についている表面板も一緒に外れます。
![【三和シャッター】シャッター錠を自分で交換してみました♪【DIY】](https://familylifeblog.net/wp-content/uploads/2022/04/replacement_shutter_lock_sanwashutter_-9.jpg)
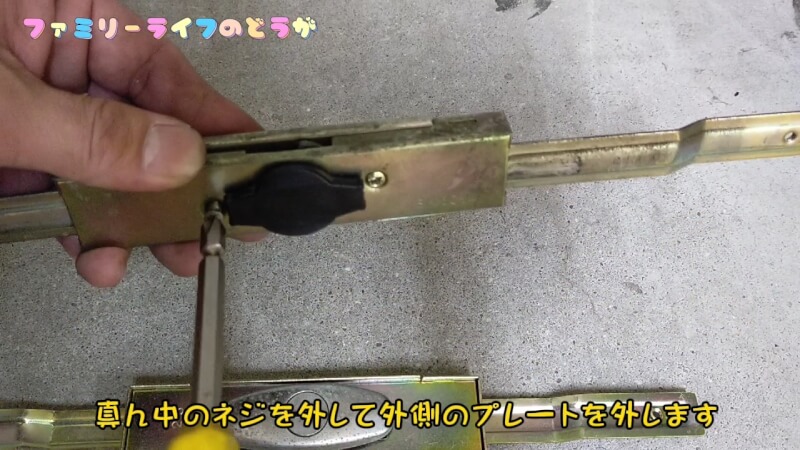
新しく用意した鍵を取り付けるために表面板を外します。サムターン付近の2つのネジを外すと表面板が取れます。
![【三和シャッター】シャッター錠を自分で交換してみました♪【DIY】](https://familylifeblog.net/wp-content/uploads/2022/04/replacement_shutter_lock_sanwashutter_-8.jpg)
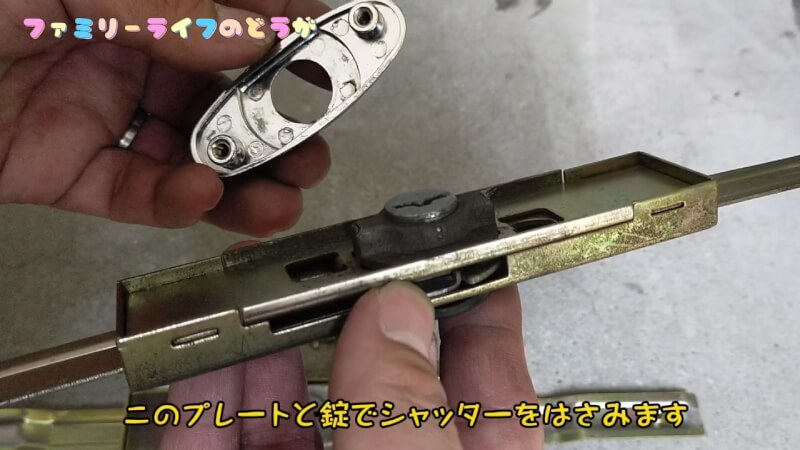
このように表面板のプレートが外れました。
![【三和シャッター】シャッター錠を自分で交換してみました♪【DIY】](https://familylifeblog.net/wp-content/uploads/2022/04/replacement_shutter_lock_sanwashutter_-7.jpg)
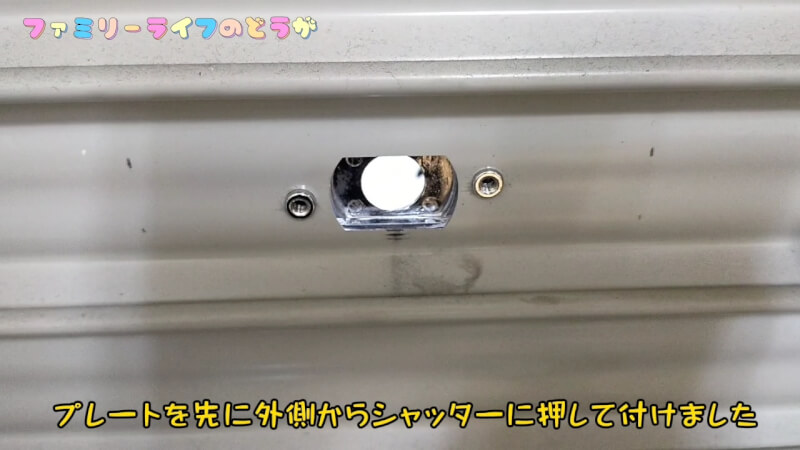
取り外した表面板プレートをシャッターの外側に先に押し込んで取り付けます。
外れる心配があるときはテープで固定するといいです。
![【三和シャッター】シャッター錠を自分で交換してみました♪【DIY】](https://familylifeblog.net/wp-content/uploads/2022/04/replacement_shutter_lock_sanwashutter_-6.jpg)
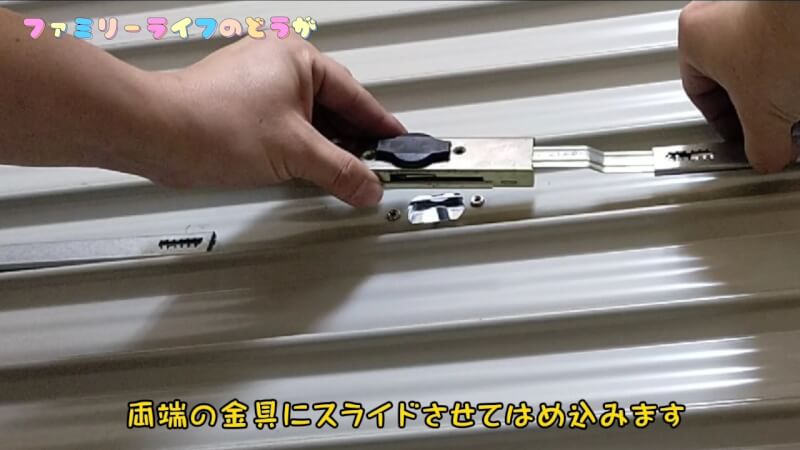
シャッターのアームに錠本体のラッチバーを左右とも先にはめ込みます。
![【三和シャッター】シャッター錠を自分で交換してみました♪【DIY】](https://familylifeblog.net/wp-content/uploads/2022/04/replacement_shutter_lock_sanwashutter_-5.jpg)
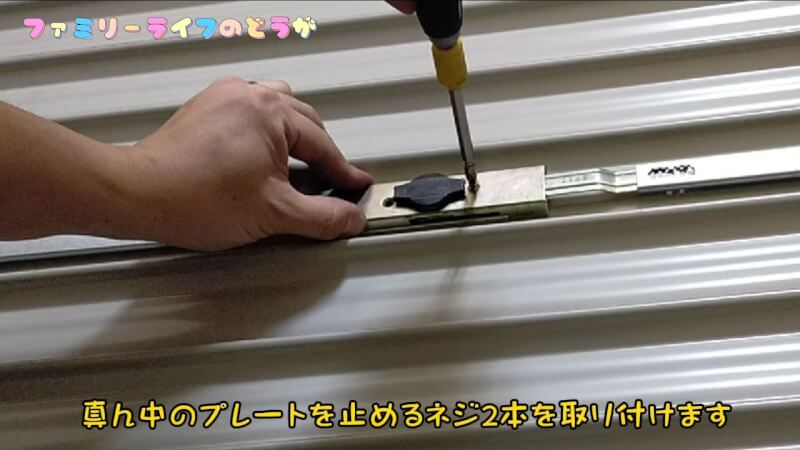
ラッチ付近の表面板のプレートをとめるネジ2箇所を取り付けます。
![【三和シャッター】シャッター錠を自分で交換してみました♪【DIY】](https://familylifeblog.net/wp-content/uploads/2022/04/replacement_shutter_lock_sanwashutter_-4.jpg)
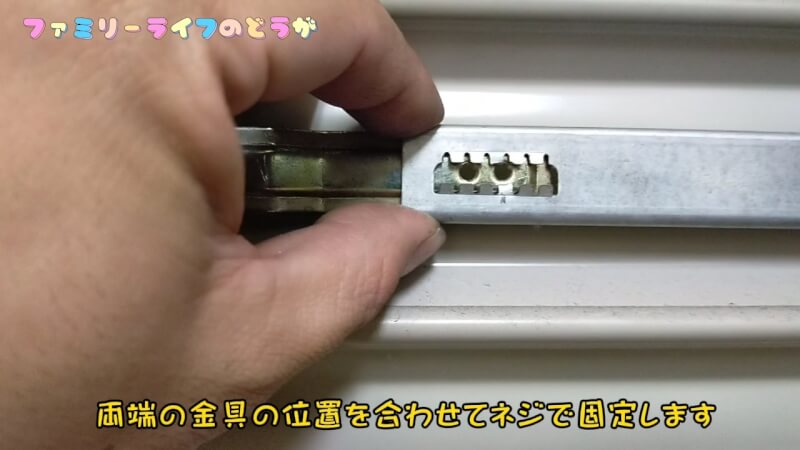
錠本体ラッチバーとシャッターアームの位置を合わせます。取り外した錠と同じ位置に調整します。
![【三和シャッター】シャッター錠を自分で交換してみました♪【DIY】](https://familylifeblog.net/wp-content/uploads/2022/04/replacement_shutter_lock_sanwashutter_-3.jpg)
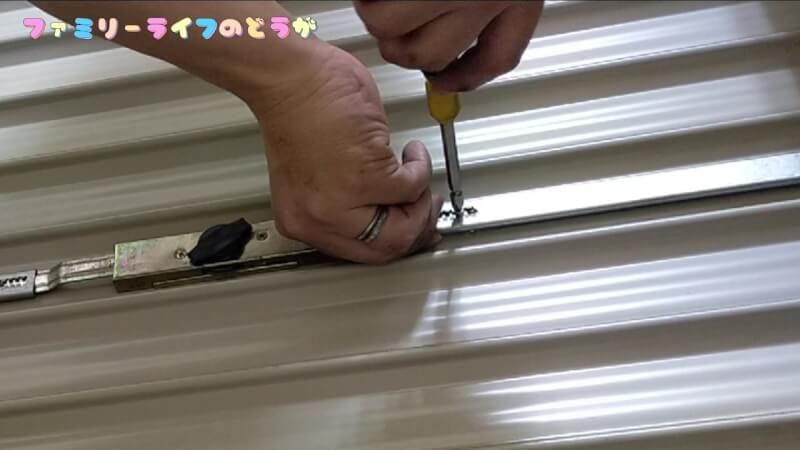
調整ができたら2箇所のネジを締めて固定します。
![【三和シャッター】シャッター錠を自分で交換してみました♪【DIY】](https://familylifeblog.net/wp-content/uploads/2022/04/replacement_shutter_lock_sanwashutter_-2.jpg)
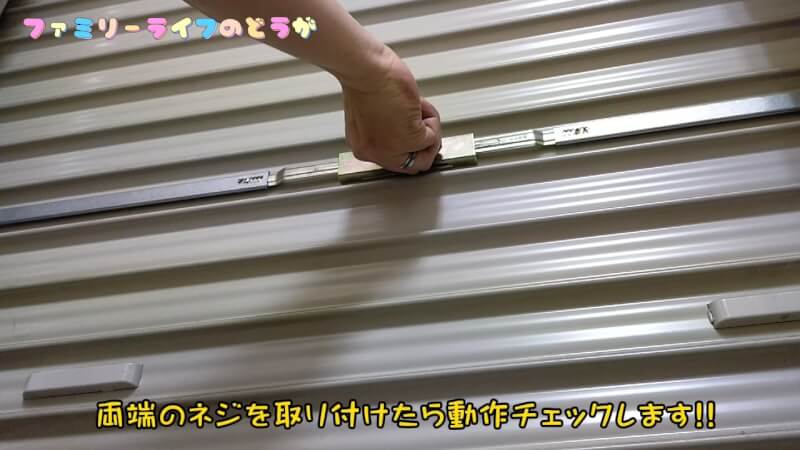
ネジの取り付けが終わればシャッター錠の動作を確認します。
内側のサムターンを回して鍵の開閉をチェックします♪
![【三和シャッター】シャッター錠を自分で交換してみました♪【DIY】](https://familylifeblog.net/wp-content/uploads/2022/04/replacement_shutter_lock_sanwashutter_-1.jpg)
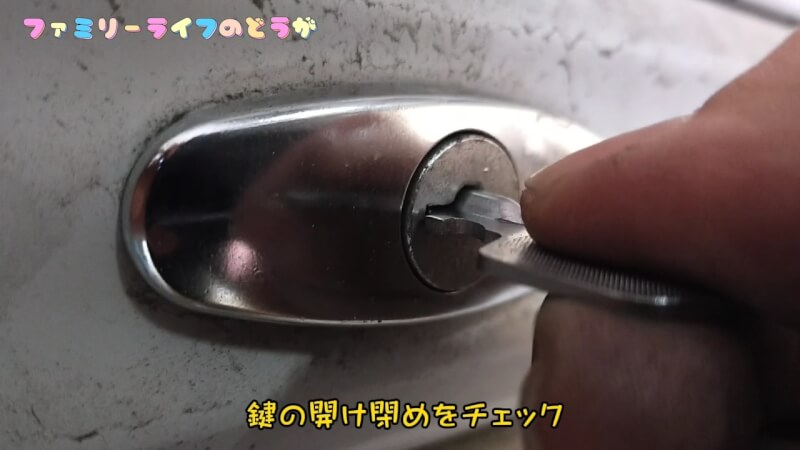
内側が問題なかったので外側にガギをさして開閉チェックします。
鍵の回りも問題ないですねぇ〜
これで無事にシャッター錠の交換が完了です♪
今回は「三和シャッター」のシャッター錠の交換方法の紹介でした。
![](https://familylifeblog.net/wp-content/themes/cocoon-master/images/man.png)
交換はとても簡単でした♪鍵屋さんに頼むと2万はするみたいなので自分で取り付けて節約できました♫
「三和シャッター」のシャッター錠の交換方法の動画紹介
今回紹介した「三和シャッター」のシャッター錠の交換動画をYoutubeにアップしました♪
よかったら見て言ってください♫
![](https://familylifeblog.net/wp-content/themes/cocoon-master/images/man.png)
グッドボタンとチャンネル登録ヨロシクお願いします♪
↓他の記事もご一緒にどうぞっ↓
![](https://familylifeblog.net/wp-content/uploads/2021/10/screen_door_roller_repaper_diy_ic-160x90.png)
![](https://familylifeblog.net/wp-content/uploads/2021/07/diy_rental_tools_kohnan_ic-160x90.jpg)
![](https://familylifeblog.net/wp-content/uploads/2021/01/diy_ventilation_fan_replacement_ic-160x90.jpg)
![](https://familylifeblog.net/wp-content/uploads/2020/12/diy_air_conditioner_cleaning_panasonic_ic-160x90.jpg)
![](https://familylifeblog.net/wp-content/uploads/2020/07/review_tool_ratchet_driver_ic2-2-160x90.jpg)
![](https://familylifeblog.net/wp-content/uploads/2020/05/screen_window_repaper_ic-160x90.jpg)
![](https://familylifeblog.net/wp-content/uploads/2020/01/window_hard_open-4-160x90.jpg)
![](https://familylifeblog.net/wp-content/uploads/2019/12/panasonic_washstand_waterleak_repair-1-160x90.jpg)
![](https://familylifeblog.net/wp-content/uploads/2019/12/panasonic_washstand_waterleak_repair-17-160x90.jpg)
コメント